Week7 - Embedded Programming
read a microcontroller data sheet,program your board to do something, with as many different programming languages and programming environments as possible
CLASS WEB PAGE:
http://academy.cba.mit.edu/classes/embedded_programming/index.html
DOWNLOAD FILES:
BLINK CODE
First thing to do for this assignment was to learn how read a DATA SHEET. Then I have programmed my Hello-World board by using the FabISP programmer with the Arduino IDE and ARDUINO BOOTLOADER.
REFERENCES:
Arduino IDE Software
Arduino ATtiny hardware Library
FTDI Drivers
Programming the ATtiny44 microcontroller
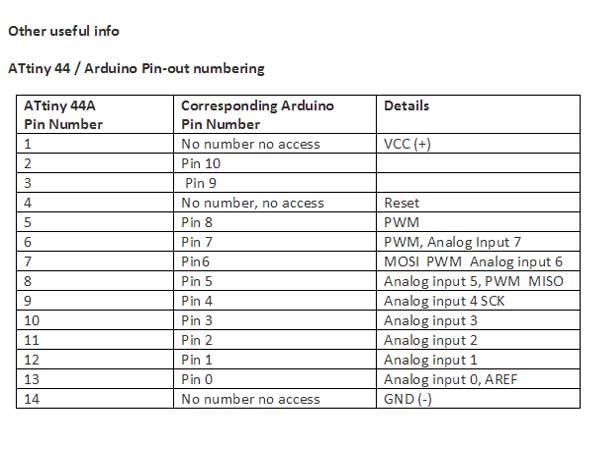
The data sheet of the Atmel Attiny 24, 44 and 84A processors is a 286 page document of technical details.Several pieces of important data are given right in the beginning of the document, among which: the pin configuration and pin functions such as ADC, PWM etc. In order to program the processor and blink a LED using the Arduino IDE, the correct pin number of that LED should be used
After installing all the required software, drivers and libraries, I programmed the HELLOboard with Arduino IDE, for that I needed to follow severals steps.
-Steps to programming the micro controller with Arduino:
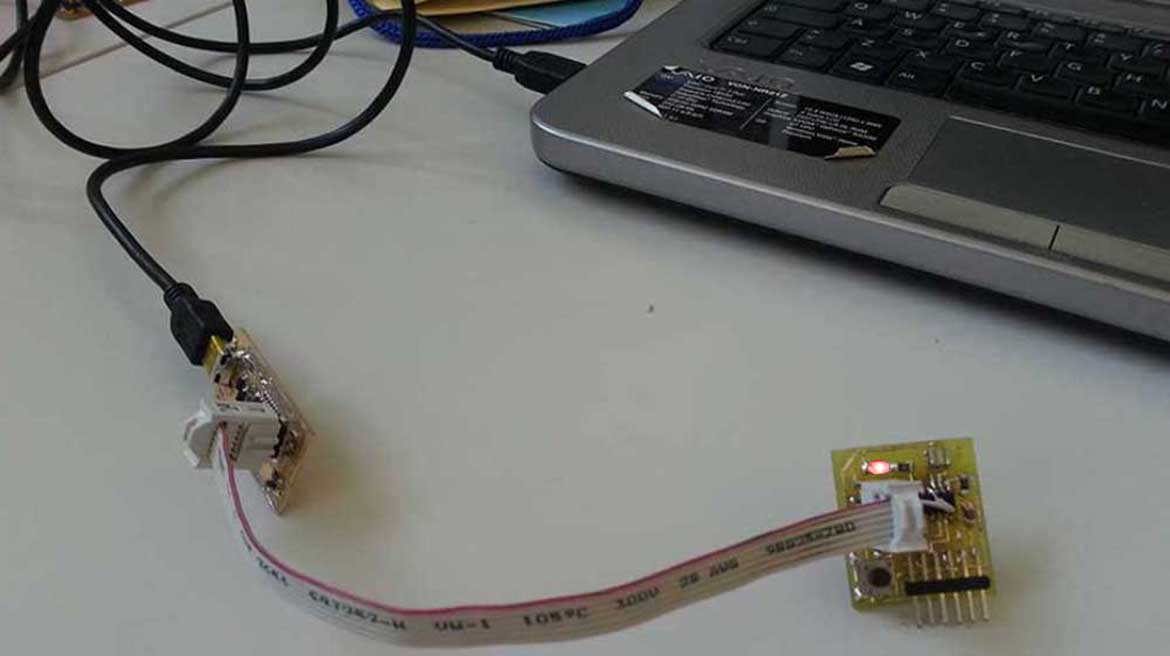
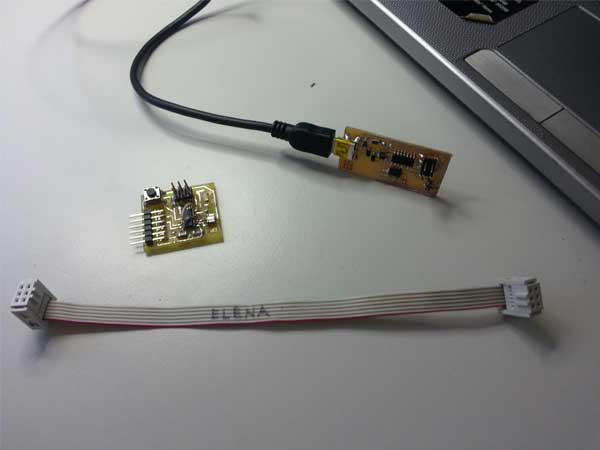
Connect the ISP programmer with the Hello board using my ISP connector cable.
With the USB cable conect ISP programmer to my computer and open Arduino IDE.
-Go to Tools > Board menu and select ATtiny44 (20 Mhz Clock).
-Go to Tools > Programmer menu and select USBtinyISP.
-Go to Tools > Select Burn To Bootloader to execute the bootloader to the microcontroller.
If the operation is succesfull it's possible read the message of Arduino IDE: DONE BURNING BOOTLOADER.
To complete the procedure, it's necessary sends an Exemple Sketch of IDE to the Echo Hello-World.
Programming the Hello Board
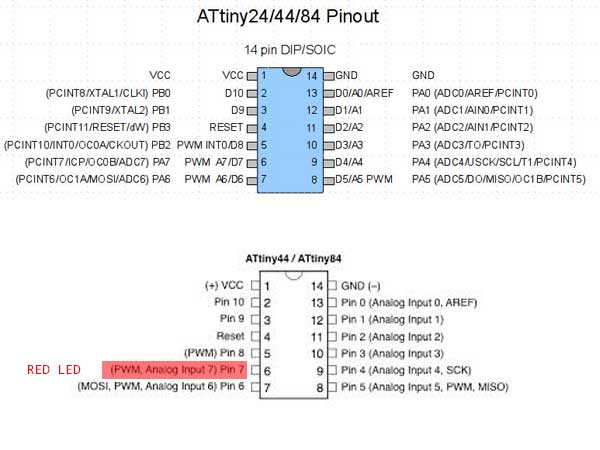
First of all needs to find out that what is the pinout for led, for that I have checked the schematic layout of ATtiny44 microcontroller to refer the pin numbers which are being used in my HELLOboard.
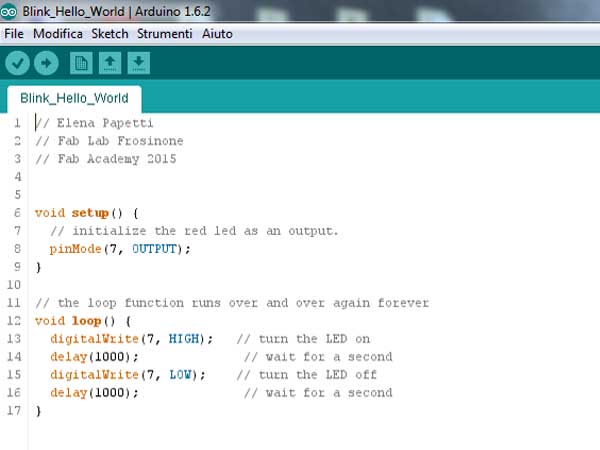
Simple Blink Test:
To test if my board is perfectly soldered and is working the simple way is upload an led blink script example on Arduino IDE but for that you have to make sure that FabISP and HELLObboard are connected to the computer.
-Go to Files > Examples > Basics and select Blink
-Change the int led = 13 value to corresponding pin number int led = 7
-Upload the code in the top-left corner on the IDE
NOTE:
It's really important to understand the datasheet and how to connect everything. I found it handy to make a schematic of the wires and what they are connected to.